Showing posts with label jars. Show all posts

Thursday, September 15, 2016

Liquor Lights - Easy Outdoor Solar Lights

I love to reuse and recycle lots of things, and I always find a use for glass jars. After throwing a few parties in the last year, I had I gorgeous tequila and other liquor bottles that I saved. Just waiting to find an idea on how to reuse them...

Then as I was replacing/repairing my outdoor solar lights, it occurred to me that I could stick the  plastic solar tops on my pretty jars and bottles.


All sorts of glass bottles will work for this project. At first, I wanted to do only the "fancy" bottles. Then I came to really like just the 2 liter Vodka bottles with a handle.  I like all the different heights and sizes too.

Step 1:
Have a nice collection of bottles ready. Remove labels (I soak in soapy water and then use a knife to scrape the last bits).

Step 2:
Unpackage your solar lights. Take the top off the lights, where the light bulb is. Remove any protective covering over the solar panel, and make sure it is turned on. Put it in the sunlight, solar panel up, while you work.
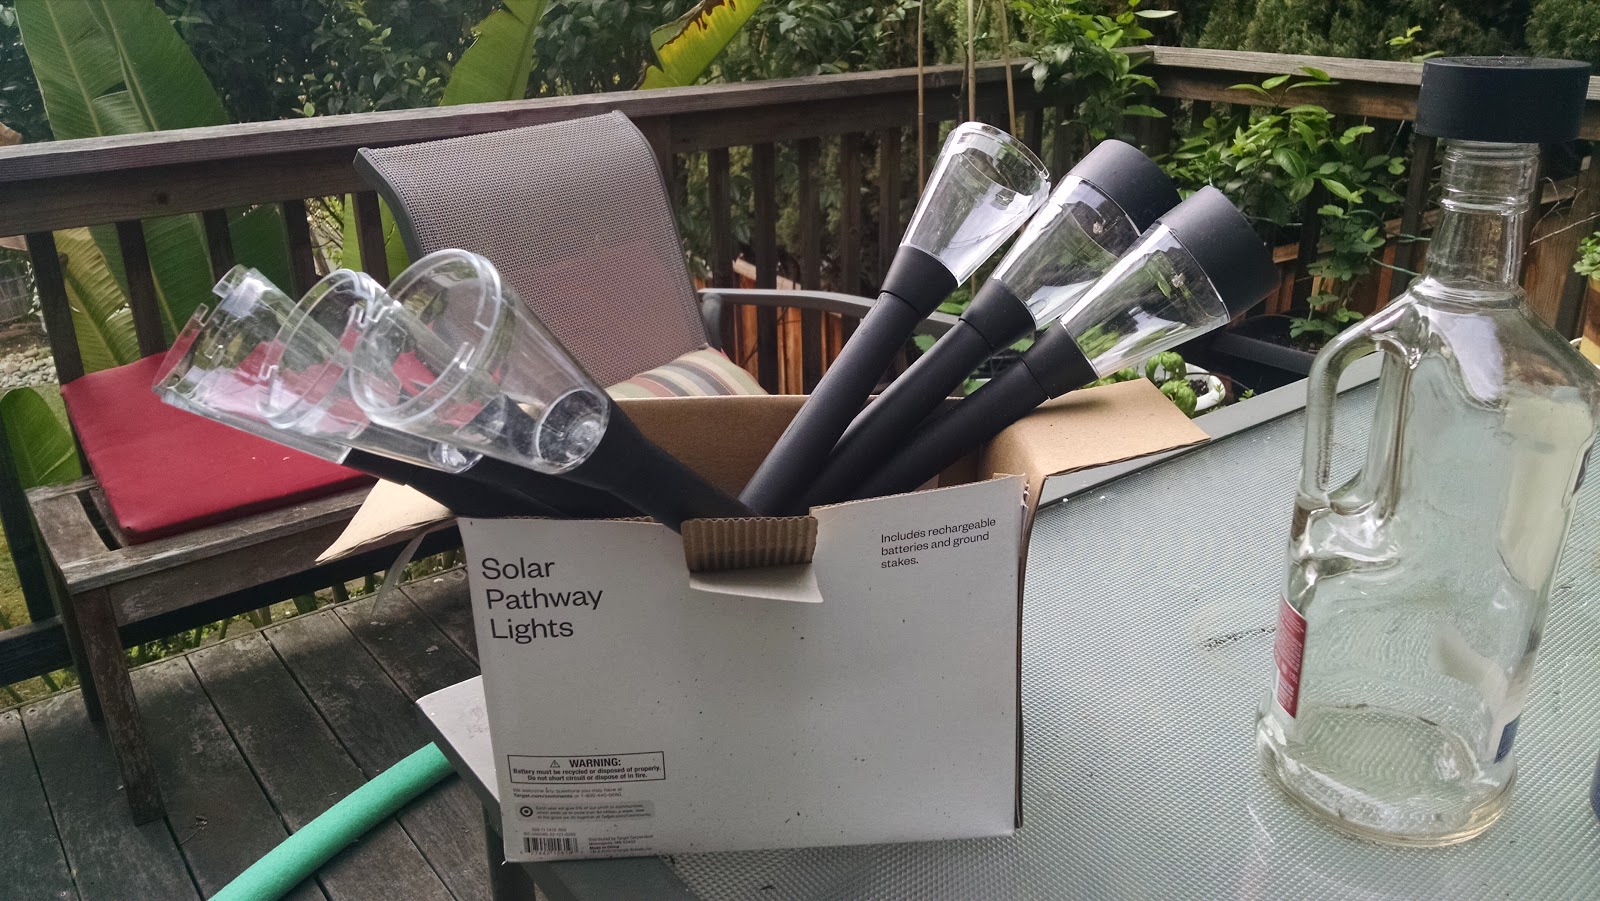


Step 3: Place the solar tops on the mouth of the bottles.

Step 4: Wait for it to get dark!

Voila! 


Saturday, September 5, 2015

Repurposed Jars - Glitter Lantern


I save pretty much all my glass jars, just in case a fun project comes up. Jam and jelly jars, peanut butter and pickle jars, olive and coconut oil jars! Each one is unique and will be great for some future repurposing project.

I hosted a large party where we decided to make small lanterns as the guest's party favor. It was a bonus that we could used the lanterns to decorate during the party, then they would help light the guests on their way home.

The best part of this project is that over a year later, I still see friends using this party favor in their homes or patios!

We used all different kinds of jars: pickle (bigger and squat), jam (wide mouthed and smaller), olives (taller with a wide mouth) and lots of pasta sauce jars. All the different shapes and sizes were fun to see!

Super Simple How To:
1. Soak the jars in soapy water to remove any glued labels, or use a knife to scrape off any remaining stickiness.

2. Once cleaned, I painted the insides of each jar with a mixture of watered down glue (or modge podge)and silver glitter. The glue will dry clear, so only the glitter is left behind. 

3. I then used crafting wire to wrap around the mouth and make a simple handle.

4. Add some fine sand to the bottom. Depending on the amount of glitter you may not be able to see much of what is inside the lantern.

5. Insert a battery tea lights, and watch it twinkle!


Friday, May 22, 2015

More Repurposed Jars

 I've mentioned before that I save all glass jars, and I wasn't kidding. I just wash and clean them, and set them aside... waiting for inspiration or a project to come up. Since I have a household full of boys, I don't get to be girlie often, by I love to use glitter in my projects.

For the pen jar above I used a Coconut Butter jar that has a nice wide mouth as a sparkly pen jar. After the jar was clean, I used small paint brush to coat the INSIDE of the jar with Modge Podge and silver glitter. I let the jar dry three times and redid the painting process after each time. Otherwise you are just moving all the glitter around, but if it is dry you are truly adding another coat. This fully covered the inside of the jar with glitter.

When dry I did a thick layer of Modge Podge inside the jar with NO glitter to seal layers and so the glitter won't come off.

In the background is a large olive jar that I used thin painters tape and gold spray paint to created a shiney vase with stripes. The last is a probiotics bottle, with a more narrow mouth. I used Snow Glitter (which is coarse and opaque, a lot like epsom salts) on the outside, applied with Modge Podge. Here is the same vase with a few pretty flowers.


Thursday, January 22, 2015

Book Club: Where'd You Go Bernadette


I host a charity book club with a group of friends, and it is always a challenge when my turn comes around to set the tone for the evening. You want to serve items and decorate around the theme of the book. Of course we had to include some penguins, and I wore the yellow scarf and sunglasses part of night.


The highlight was Pioneer Woman's Blackberry Cobbler in celebration of blackberry bushes that took over her backyard. I also served little Trader Joes Pizzas, just like the pizza cart they had in the disastrous party. At the bar I served a Pink Sangria (equal parts Rose wine and Blood Orange Soda, with fruit garnish) that I dubbed The Pink Penguin.  Here is a great article called "Where'd You Go (for dinner) Bernadette?" that links up the actual Seattle version of the fictional family's meal plan and might give you more ideas.

Table Setting:
I made my little chalkboard menu from black butcher paper, which works just like a chalkboard! I love using black butcher paper and black poster board as a chalkboard, it is so easy and super inexpensive! I collect cool wrapping paper too, and use it for all sorts of project, but rarely to wrap a gift (go figure!). Here I used it as a table runner since it's an easy way to add color and patterns to the table. The vase is a reused olive jar the I used thin painters tape and gold spray paint on to add some shine. 


Tuesday, January 6, 2015

Mason Flower Jars Thank You Gift

Recently I needed to make a large number of inexpensive Thank You Favors and decided on repurposing mason jars into small flower vases. I hosted a Thank You Party for all the ladies who have volunteered for a school event and used the jars as a table center piece, but near the door so they could take one when they left. It was the day before Mother's Day, so it made for a really nice gesture. 

How To:
I used purchased mason jars at Smart & Final and ran them all through the dishwasher wash off any dirt or oil. I then used painters tape to create a striped effect on half the jars, the rest I painted completely. The party had a candy theme, so I used two different pink spray paints. I quickly created printable tags and saved the document for you use HERE. Printing them on Cardstock makes a nice little tags. (Cardstock is basically very thick paper and handy to always have on-hand). I cut out the tags, punched a hole and wrapped twine around each jar. My co-host brought two bunches of beautiful flowers that we trimmed up and added to each jar. 

Supplies Needed:
* Painters Tape - thin
* Twine - I used a combo of jute and pretty craft twine
* Google Doc Thank You tags (use mine!)